
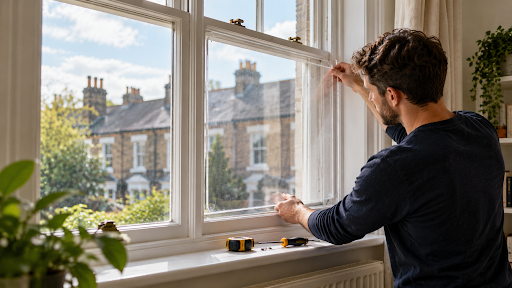
Secondary glazing adds a second pane inside your existing window, trapping a layer of air that cuts heat loss and noise. Done yourself with an acrylic sheet, it costs a fraction of replacement windows.
This guide walks you through a practical DIY secondary glazing project, step by step.
Why Acrylic Beats Glass for DIY Secondary Glazing
Acrylic suits a home DIY project far better than glass. The reasons are practical:
- Light: Half the weight of glass, so it is easy to lift and fix
- Safe: It will not shatter if you drop it during fitting
- Clear: It lets through plenty of light, close to glass
- Warm: It feels less cold to the touch, which reduces condensation
- Easy to cut: You can trim it at home, or order it cut to size
When you order acrylic sheets cut to size means each panel arrives ready to fit. You do not need to do any cutting at home.
What Secondary Glazing Actually Does
A single pane of glass loses heat fast. Secondary glazing fixes that by adding a second barrier and an air gap between the two. That trapped air is what does the insulating.
Here is what a well-fitted panel delivers:
| Benefit | What it means for you |
| Less heat loss | A warmer room and lower heating bills |
| Less noise | A quieter home near roads or railways |
| Less condensation | Drier windows and less mould |
| Lower cost | Far cheaper than new double glazing |
For older homes, especially those with single-glazed or sash windows, the difference is noticeable within days.
Choosing Your Acrylic and Fixing Method
Before you start, two choices shape the job: the sheet thickness and how you fix it.
For thickness, a few millimetres is enough for most windows. Thicker sheets stay more rigid across a wide window. For fixing, you pick a method to suit how often you want to remove the panel.
Common fixing methods include:
- Magnetic strip: easy to remove for cleaning, popular for sash windows
- Clip-in channel: a neat framed fit that stays put
- Hook-and-loop tape: quick and cheap, good for a first try
- Screw-fixed frame: the most permanent option
Magnetic fixing is the favourite for a reason. It lets you lift the panel off to open the window, then click it back on.
How to Fit DIY Secondary Glazing: Step by Step
Step 1: Measure the Window Opening
Old windows are rarely square. Measure the recess width and height at three separate points to find the true dimensions.
Rule of Thumb: Always record the smallest reading. This stops the panel from jamming during installation.
Write down your measurements clearly in millimetres. Precision at this stage guarantees a tight thermal seal.
Step 2: Order Your Acrylic Panel Cut to Size
Ordering sheets factory-cut makes installing acrylic secondary glazing fast and simple.
| Option | Practical Result |
| Factory-Cut Panel | Delivers smooth, ready-to-fit edges with zero hassle. |
| Home Trimming | Risks cracking the sheet and leaving uneven gaps. |
Keep the protective film attached to both sides. It guards against surface scratches while you handle the panel.
Step 3: Prepare the Window Frame
Adhesive mounting strips require a clean surface to form a permanent bond. Follow this order to prepare the frame:
- Clean: Wipe away all dust, grease, and grime from the perimeter.
- Dry: Let all moisture evaporate completely before applying fixings.
- Repair: Sand down peeling paint and patch damaged timber first.
Step 4: Fit Your Chosen Fixing
Mount your hardware directly to the window frame first. Work slowly to maintain accurate alignment.
For Magnetic Tape Systems:
Stick the adhesive steel tape around the frame. Apply the matching magnetic strip along the outer edges of the acrylic panel.
For Channel Frame Systems:
Screw or bond the rigid mounting channels along the inside of the window recess.
Use a spirit level across the top edge so the fixing sits square. Press adhesive strips firmly to remove trapped air pockets.
Step 5: Fit the Acrylic Panel
Peel off the protective film right before mounting. Align the top corners first, then press the sheet gently into place. Magnetic tape will snap the panel into position automatically.
Seal Check: Run your fingers along every edge to confirm a tight seal. Any remaining gap lets warm air escape.
Step 6: Check and Finish
Step back and inspect the completed installation. Test the setup by removing and reattaching the sheet once to ensure easy access for window cleaning.
Press down any tape sections that show slight lifting. Once fitted properly, the panel feels snug and looks virtually invisible from across the room.
DIY Secondary Glazing for Sash Windows
Sash windows need a little extra thought, since you still want them to open. A removable fixing is essential here, which is why magnetic strip is the go-to for DIY secondary glazing for sash windows.
Fit the magnetic panel to the inner frame, and you can lift it off whenever you need to open the sash. In summer, store the panels flat and refit them in autumn. This keeps the period look of the window while adding the winter warmth.
Should You Use a Kit or Buy the Sheet Cut to Size?
Both routes work, and the right one depends on you. A DIY secondary glazing kit bundles the sheet and fixings together, which suits a first-timer who wants everything in one box. Buying the acrylic cut to size and choosing your own fixings often costs less and gives a more tailored fit.
For a single tricky window, cut-to-size gives the cleanest result. For several standard windows, a kit can be quicker. Either way, the principle is the same, and the DIY saving over new windows is large.
Warm Up Your Home This Winter
Acrylic secondary glazing is one of the best-value DIY jobs a UK homeowner can take on. It cuts heat loss, quietens the room, and costs far less than replacement windows. Most people fit a window in under an hour once the panel arrives.
Start by measuring your coldest window this week and ordering the panel cut to size. The same precision-cut acrylic that makes a clean secondary glazing panel is what we cut for every acrylic splashback, so you know the fit will be exact.
FAQs
How much does DIY secondary glazing with acrylic cost?
It costs a fraction of replacement double glazing, mostly the price of the acrylic panel and fixings. Exact cost depends on window size and how many you do.
Will acrylic secondary glazing stop condensation?
It reduces it a lot, since the warmer inner pane stops moisture settling. Good ventilation alongside it gives the driest result.
Can I still open my window with secondary glazing fitted?
Yes, if you use a removable fixing like a magnetic strip. You lift the panel off to open the window, then click it back on.
How long does acrylic secondary glazing last?
Quality UV-stable acrylic lasts for years without yellowing. The fixings may need refreshing sooner, depending on the type you choose.
